Tuesday, July 6, 2010

Shop Additions

A while back I bought a bandsaw. Some readers might be surprised because "aren't you the all hand-tools guy?" Well there are certain things best not done by hand, for example resawing. The saw is a small 14" 3/4 HP import that I bought used for $170.

The next thing is a stand for my drill press. This was on my list as I got tired of kneeling down whenever I wanted to use it. It's made of 2" x 4" construction lumber. The drill press base is offset because I realized after I built the stand that the center of the drill press's gravity should be in the middle of the stand.

The third and final project was to make a lumber rack. It too is made of construction lumer as well as leftover wood from a packing crate.

Monday, July 5, 2010

Workbench Improvements

After seeing Christopher Schwarz's post about his latest workbench, I was inspired to make a tool rack on the back of my bench. It's made of poplar with a 3/4" gap. I also added a shelf to my bench which was on my list for a long time. It's made of 1"x 10" pine that I bought at Lowes for about $9. The shelf sits on two pieces that are screwed into the front legs (for the front one) and to the side stretchers (for the back one). Now why didn't I just screw both of them to the legs? Well since I still want my bench to be knockdown, in order to take out the shelf first when breaking down the bench, the shelf will have to rotate and then slide out the side of the bench, so the shelf stretchers cannot be the same size as the interior dimension of the legs. If they were I would have no clearance to rotate the entire shelf. If this sounds confusing to you, don't be worried because it's really not that big of a deal. The individual shelf pieces have a 1/2" wide rabbet so they can be ship lapped. Each shelf piece is nailed in the center with an about 1/16" gap in between each board (use pennies as spacers).

Saturday, June 26, 2010

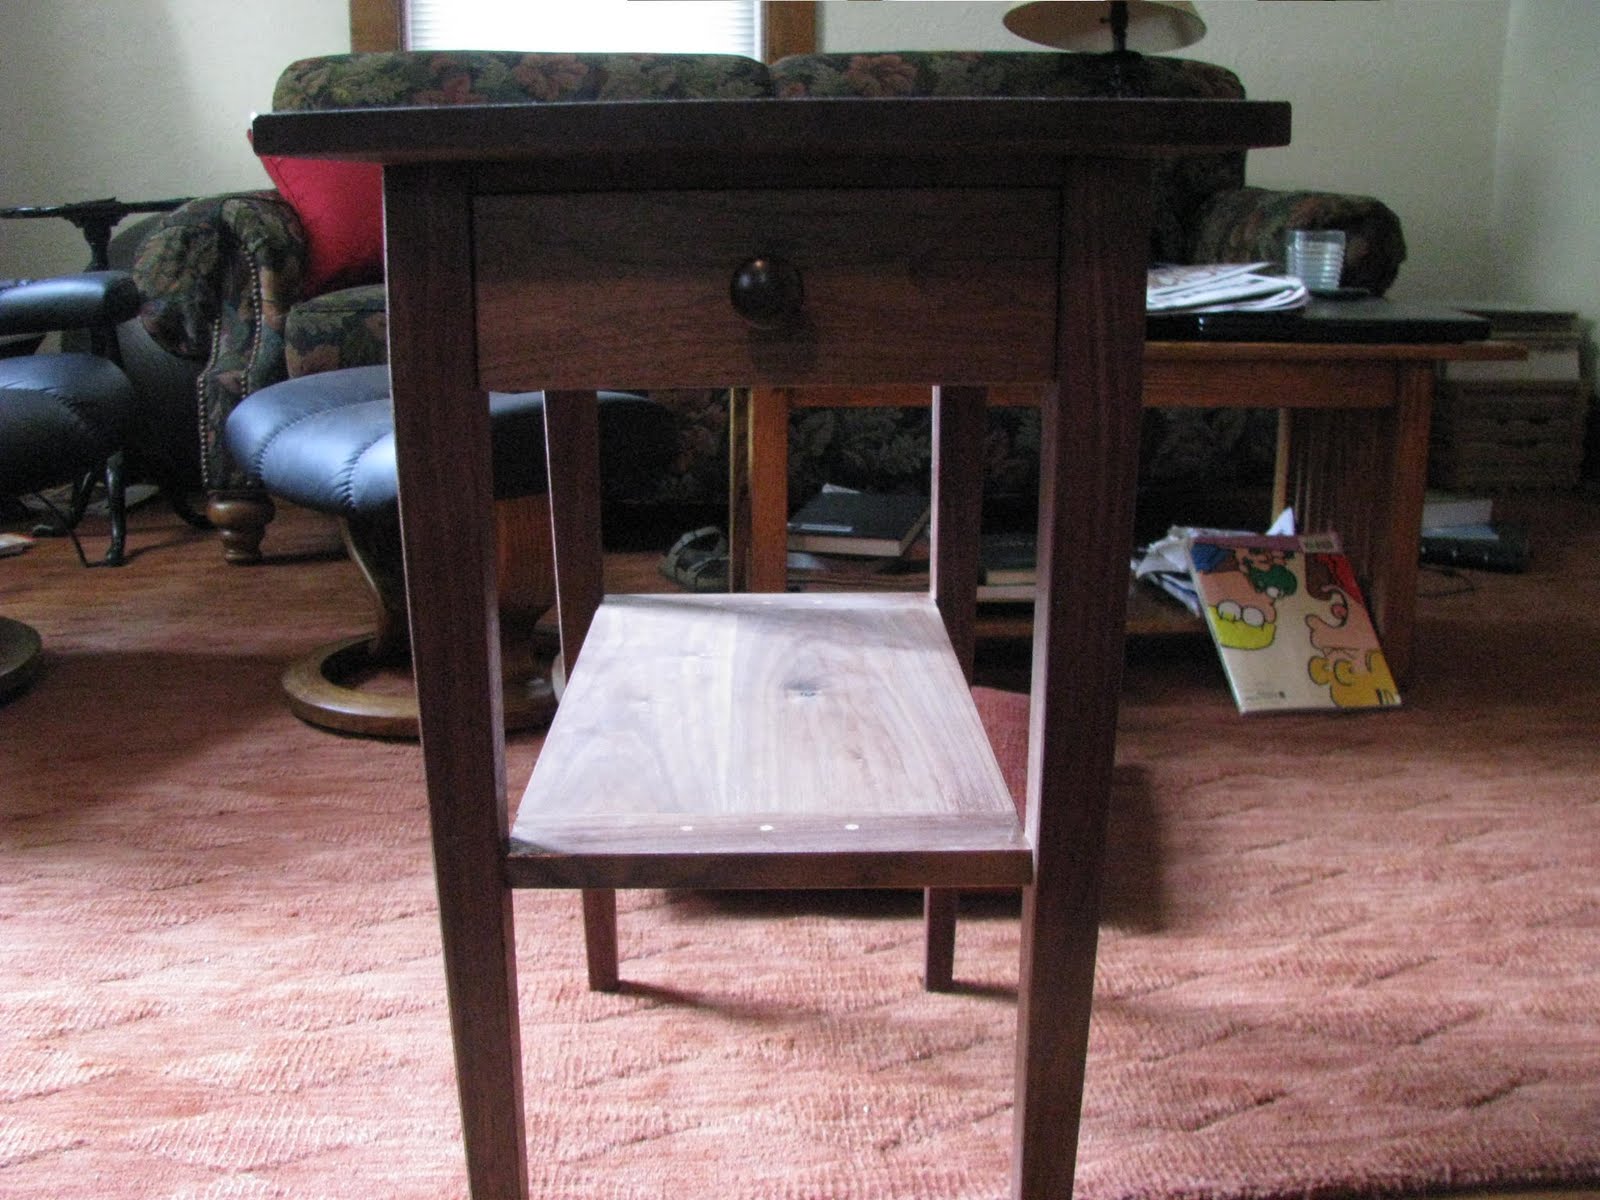
Side Table- Finished!

With the top done, I moved on to securing the top to the base. I used low profile wooden buttons in the front, and glue blocks with enlarged holes for the back. With that done, I moved on to the finish. For the first two coats I used a mixture of 1 part oil+varnish, 1 part varnish, and 1 part mineral spirits. This creates a wiping varnish with a little bit of oil. For the base I added one coat of pure wiping varnish. For the top I added 3 more. I think that overall the project came out pretty well, there are some imperfections, but they are pretty minor. Here is the table next to its "sister" table.

Thursday, June 24, 2010

Table Top

For the table top I am using two boards about 8" wide each. First I match the grain in the best way possible, and then I joint the edges and glue them together. Then I flatten and smooth one side, and just flatten the other side. This side will be the bottom. In order to lighten the look of the top, I put some bevels in. They are marked out with pencil, and then just planed to the line. Start with the two sides that are cross grain first.

Sunday, June 13, 2010

Drawer Build

With the runners glued in, I began to work on the drawer itself. I first selected a nice piece that will become the drawer face. Then I planed the edges it until it fit exactly into the drawer opening. Then I planed the sides so they would both glide smoothly on their respective sides. Then I cut a back piece to exactly the same width of the drawer front, but it is about 1/2" narrower. This allows the drawer bottom to slide into position. Then I set the distance for my plow plane' fence (with 1/4" blade) to exactly the same width as the back piece. Then I always reference the fence against the top side of the drawer parts. This makes them line up perfectly. The dovetails are the cut, thorough ones in the back and half-blind ones in the front. Make sure to space the tails so they cover up the groove in the front. After the drawer is done gluing, I plane the outsides until I have a smooth fit. The drawer bottom is made from 3/8" thick poplar. It has a 1/4" rabbet in it that allows it to slide into the drawer. When rabbeting thin sock like this, put some sort of batten across the top of it to keep it flat. For the knob I had to turn my own using my bungee lathe I posted about a while ago. Luckily all I had to do was rough it out as the tenon on the end allows me to chuck it into the drill press for easy sanding. The knob hole was drilled on my drill press so I could use my 1/2" forstner bit. The knob is glued and wedged in by a small rosewood wedge. The drawer is finished with shellac, except for the drawer front which was varnished.

Sunday, May 30, 2010

Whoops

I realized that I haven't shared what I've been up to in a while, so here goes. Here is epoxy tinted with black acrylic paint that is filling a knot hole in the breadboard shelf. The breadboards were made using the same technique that I used for the stretchers. The ends have a groove, and a matching mortise for the breadboard tenons. The ends are also slightly longer than the shelf so they can be mortised into the legs. Here is a shot of the mortise being drilled in a leg. It was later squared up. Before assembly I made some small mortises in the inside of the stretchers.

These will accommodate the buttons that will affix the top.

This is a picture of the dry fit, which is very important.
And a picture of the actual glue-up: I did this in two stages, first I glued the long stretchers in, then after they dried, I glued in the back-stretcher, the front drawer runner, the other thing that goes above the drawer (that's the technical term for it), and the breadboard shelf to the legs.

With the base done, I turned my attention to the drawer. First I glued some runners onto the inside of the stretchers. I also put in some drawer guides. These have a small rabbet that allows me to trim after they are installed by only using a block plane on its side. If there was no rabbet, I would have to use a plane whose blade extends the entire width of its body in order to get right into the corner.

Friday, May 7, 2010

Mike Wenzloff Saw Kit


A while back I ordered a saw kit from Mike Wenzloff. After some helpful emails he helped me decide what exactly I wanted. I ordered a 16" tenon saw kit, with about 11 TPI (I can't remember the exact toothing), sharpened rip. The entire saw including shipping, sharpening, and saw nuts, was $75, which is an amazing bargain.

When it arrived it was 100% worth the wait that is associated with most custom made tools. As you can see, my kit came with 3 saw nuts, the saw blade (without the holes drilled in it), and a pattern for the handle. The quality on this is amazing, especially considering the price.

I have a piece of nice bubinga that I might use for the handle, but right now, I'm going to focus on the side table project, though I might be able to fit in making a handle for this beast.

Mike Wenzloff's Web Site:
http://www.wenzloffandsons.com/